


Dwarvin Featured in Model Railroader Magazine
Read the step-by-step article, written by Cody Grivno - and see how he replaces unused incandescent lamps with Dwarvin's Lamplighter System and Globe lamps.

From the Article in Model Railroader Magazine
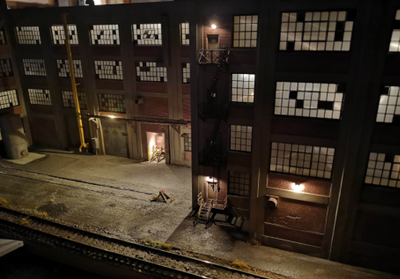
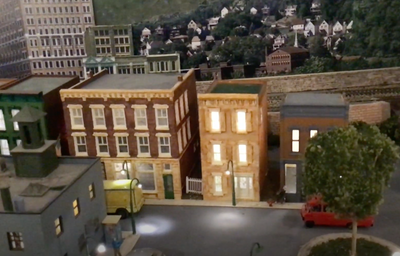
In the May 2011 issue of Model Railroader, former editor Neil Besougloff wrote about building and installing the commuter station at Williams Bay on our HO scale Milwaukee, Racine and Troy staff layout. As part of the project he installed five Model Power no. 500 lamp posts with incandescent bulbs.
At the 2019 National Train Show in Salt Lake City, we met Michael Groves, owner of Dwarvin Enterprises (dwarvin.com). He was displaying an innovative line of N, HO, and O scale street and structure lights with optical fibers attached. In addition to the lamps, he was also demonstrating the Lamplighter, the light source for the end glow optical fibers.
Since the incandescent lamps at Williams Bay were never connected, this seems like a good place to try the Dwarvin products. The system is easy to expand, which means we can add lights in the commuter station parking lot and along East Geneva Street. Since the lights don't dissipate heat, we may add lights to the interiors and exteriors of nearby structures.
Watch the Installation of the Dwarvin system by Cody Grivno


Cody was nice enough to record a video of the system. Go to MRVideoPlus.com to watch!
Step One as Outlined in MRR - Out with the Old
 Before I could install the Dwarvin HO scale globe lamps, I had to remove the Model Power lamp posts. The leads for the incandescent lamps weren't connected, but a tacky adhesive had been applied to the base of each lamp. To avoid tearing the Woodland Scenics N scale foam Track-Bed platform, I gently twisted each lamp to break the glue joint. Once the base was separated from the platform, I pulled straight up, making sure I removed the hollow plastic coffee stirrer in each hole that was used as a conduit.
Step Two as Outlined in MRR - Widening the Holes
 When the Model Power lamps were installed, 1/8th" holes were drilled beneath each one to install the hollow plastic coffee stirrer conduit and the wire leads. The 3-D printed Dwarvin globe lamps have a 5/32" diameter tube below the base where the optical fiber is inserted. In order for the Dwarvin globe lamps to seat properly, I enlarged each hole with a 5/32" drill bit. I operated the drill at slow speed so I wouldn't tear the foam station platform. If necessary, back the bit out periodically to clear any swarf.
Step Three as Outlined in MRR - Installation
 The optical fiber is sturdy, so I was able to feed it through each hole without using a hollow coffee stirrer as a conduit. Once i fed each three-foot length of fiber through the hole, i grabbed the lamp by the base and gently pressed it into the hole. I then installed a LampLighter 1 box to the bench-work. The light source for the fibers can hold 13 1.5mm fibers, 28 1mm fibers, or a combination of the two.
Step Four as Outlined in MRR - Let There Be Light
 I inserted the five 1.0mm optical fibers from the globe lamps into the LamLighter 1. Don't look into the light source when the LampLighter is turned on , as it's very bright. Then I put the barrel connector from the wall wart into the jack on the opposite end of the box. I had an extension cord at the ready so i could plug in the LampLighter 1 after I crawled out form under the layout. When I plugged in the box. the lights illuminated instantly, adding visual interest to an already well-detailed Williams Bay station scene.
Get Our System to Replace Your Old Lighting Like Cody
We are just so excited about this article! Thank you for reading and grab your starter kit today, to get started lighting your model with no wiring!
Share this
Explore more
Popular posts


Leave a comment